
Replacing a Delta Shower Cartridge
How to get a Delta tub and shower cartridge out, tell which one you have (Monitor RP19804, MultiChoice RP46074 and others), and get the right replacement.
On this page
In stock and ready to ship direct to your jobsite or shop.
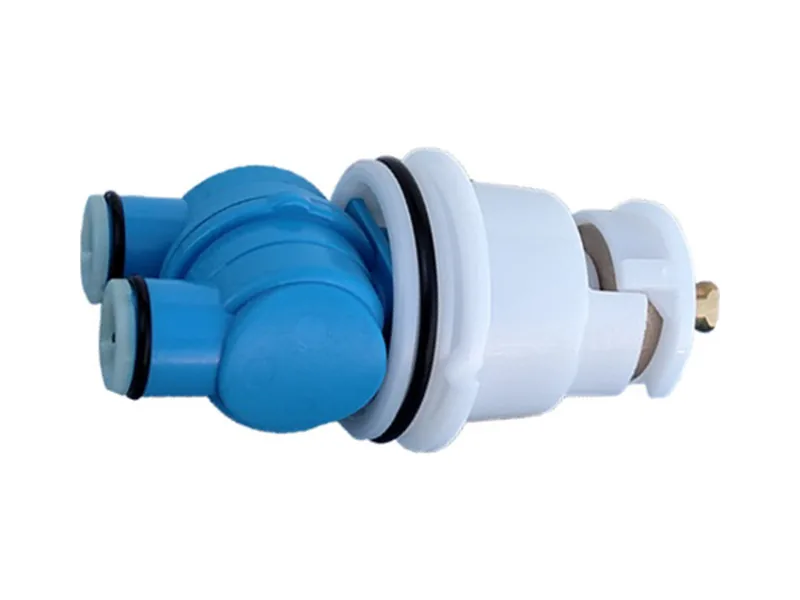 RP19804Monitor 1300/1400In stock
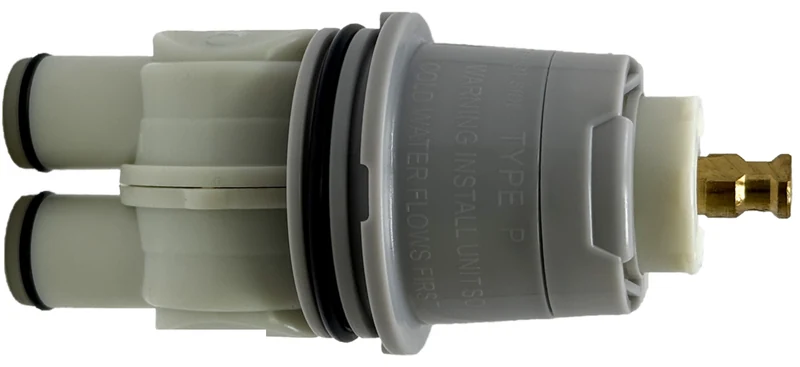 RP46074MultiChoice T13/T14In stock
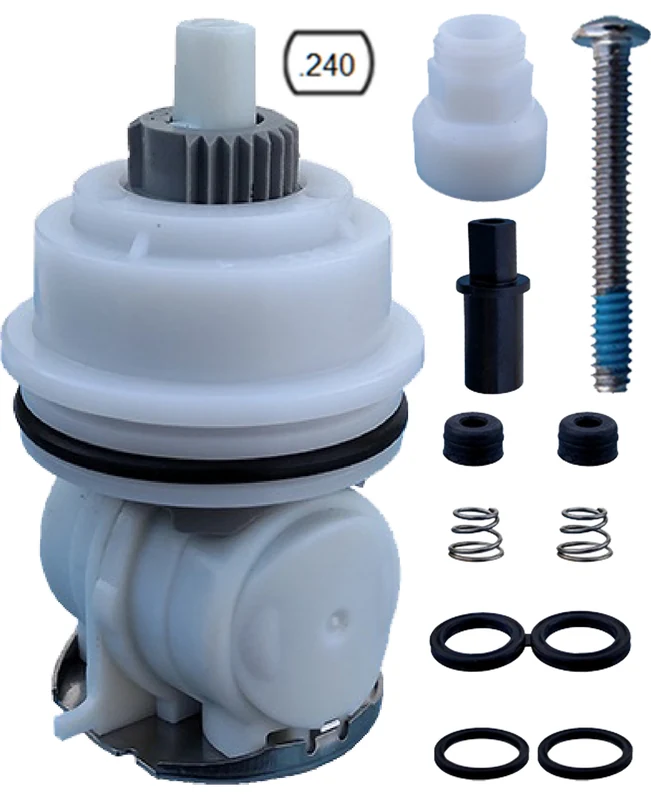 RP32104Monitor 1500/1700In stock
 RP46463MultiChoice T17In stock
See all Delta cartridges we stockNot sure which one you have?
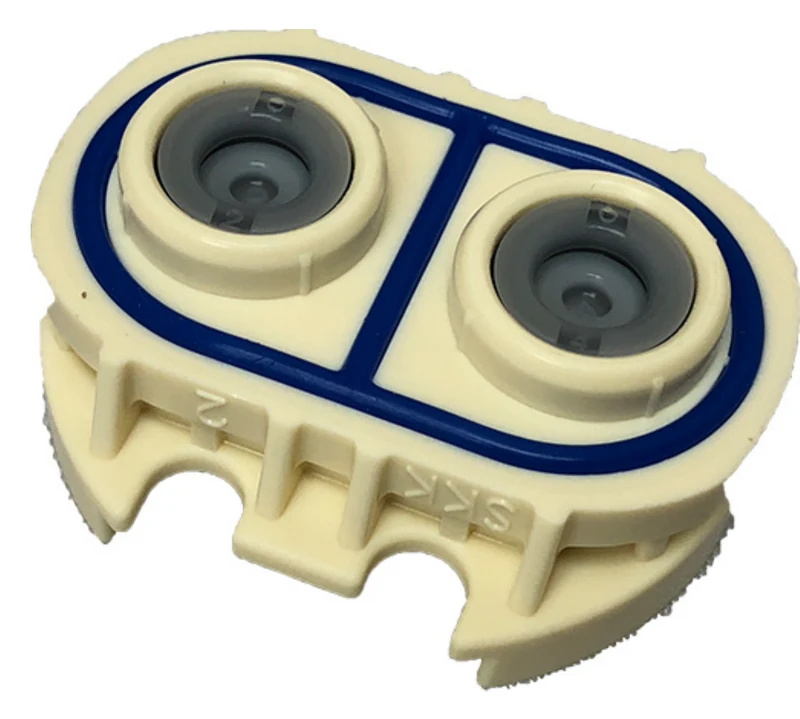
Short answer. Most Delta single-handle tub and shower valves take one of two cartridges. RP19804 fits Monitor 1300/1400 valves. It has changed over the years, but every version since about 2000 has blue legs. RP46074 fits MultiChoice Universal valves with T13/T14 trim and has cream legs under a grey body. The two are not interchangeable. Two-handle valves take RP32104 (Monitor 1500/1700), RP46463 (MultiChoice T17) or RP47201 (MultiChoice T17T thermostatic).
Jump to the photos of each one or where to get it.
Get to the cartridge
- Shut off the water. Delta’s instructions say it twice. Shut off the supplies, open the valve to drain the riser, and cover the drain.
- Remove the handle.
- Pull the sleeve off. If needed, slide the O-ring toward you, just below the back of the bonnet. Do not pull the O-ring over the bonnet.
- Unscrew the brass bonnet counter-clockwise.
- Stop and look before you pull. The cartridge comes out differently depending on which one it is, and the one in the wall may be decades old. Match it against the photos below first.
What it is: the Delta tub and shower cartridges
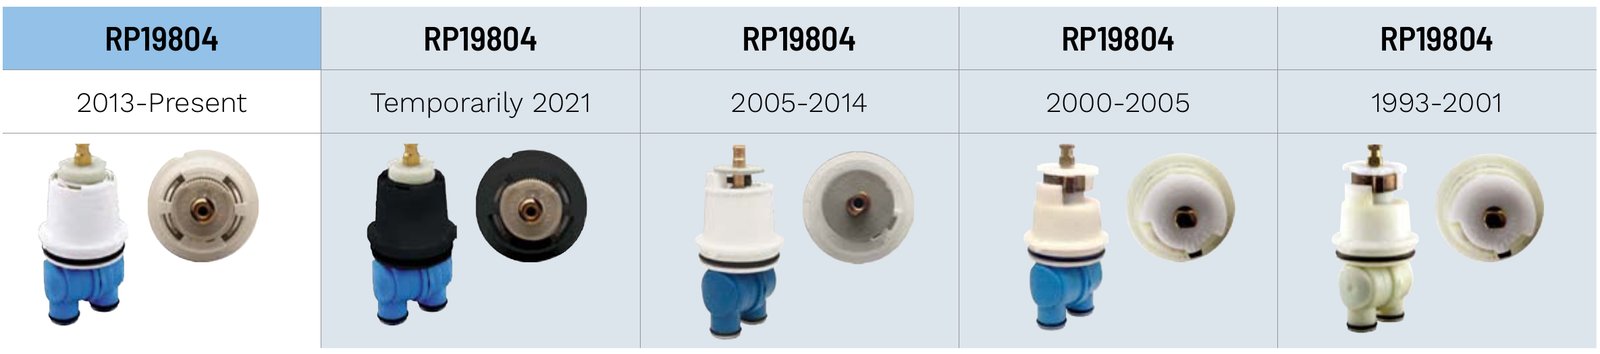
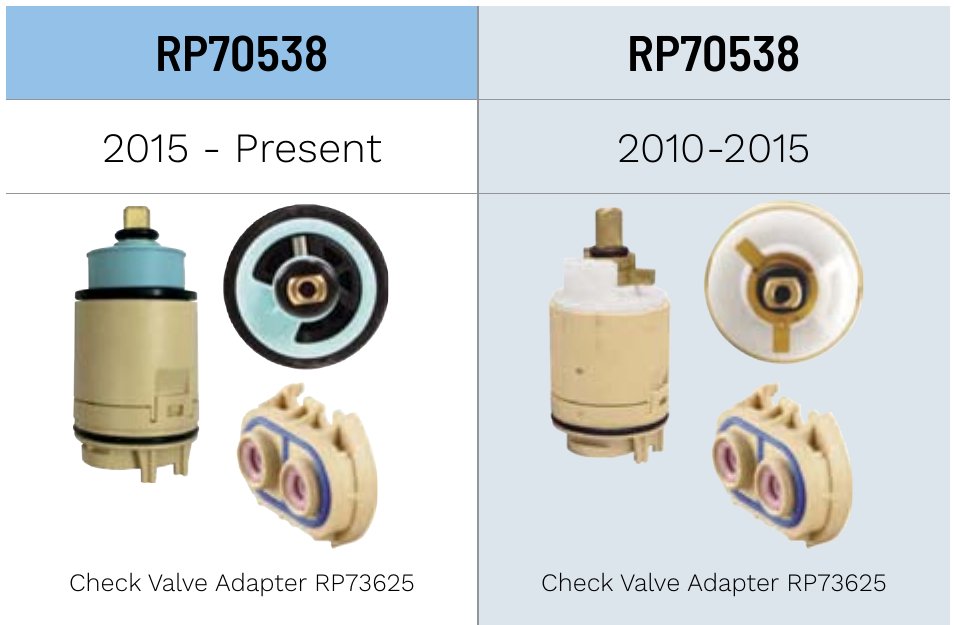
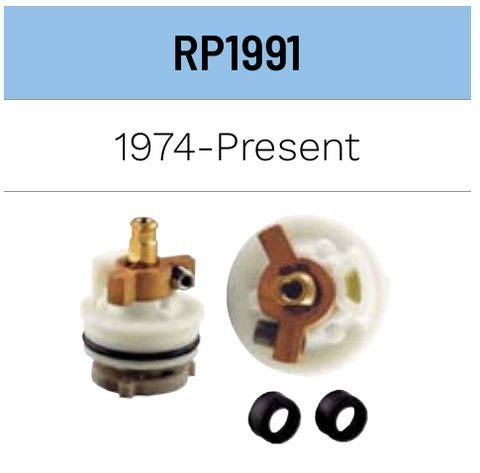
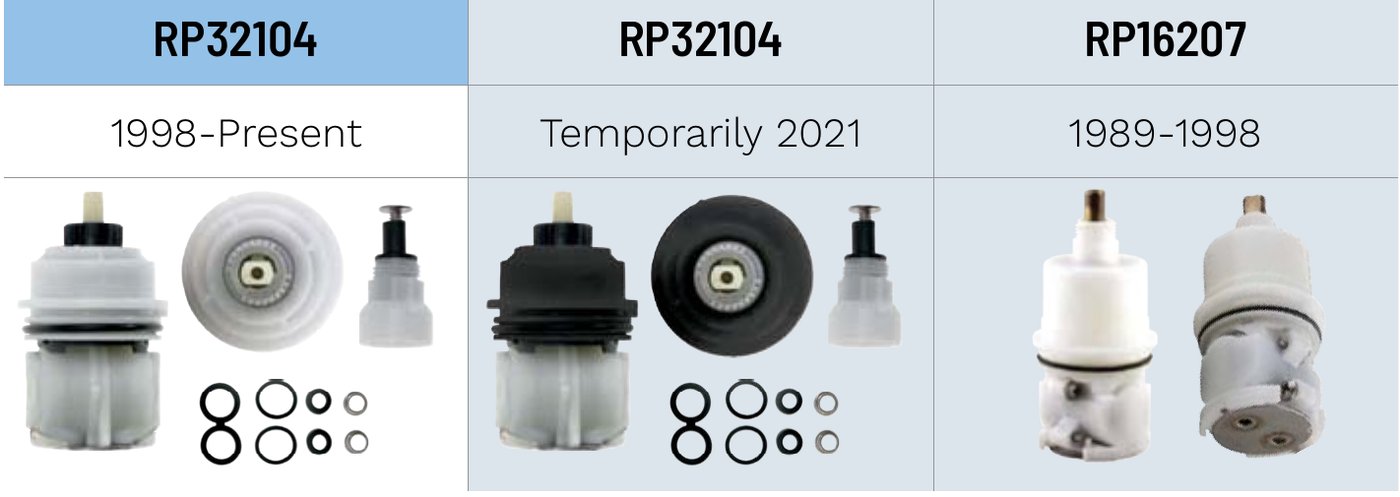
Delta has changed the look of its cartridges over the years, so the one you are looking at may not match a current product photo. These are Delta’s own photos of every version, newest on the left.
One handle
RP19804 for Monitor 1300/1400
RP46074 for MultiChoice Universal, T13/T14 trim
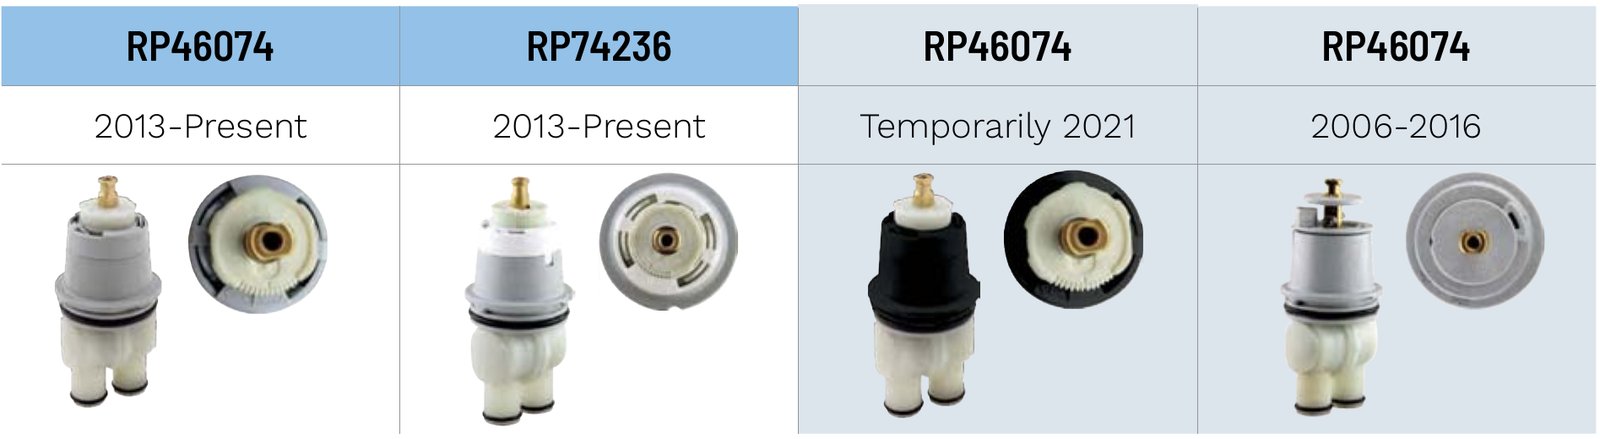
RP70538 for B114900 series, and RP1991 for the 1600 series
Two handles
RP32104 for Monitor 1500/1700
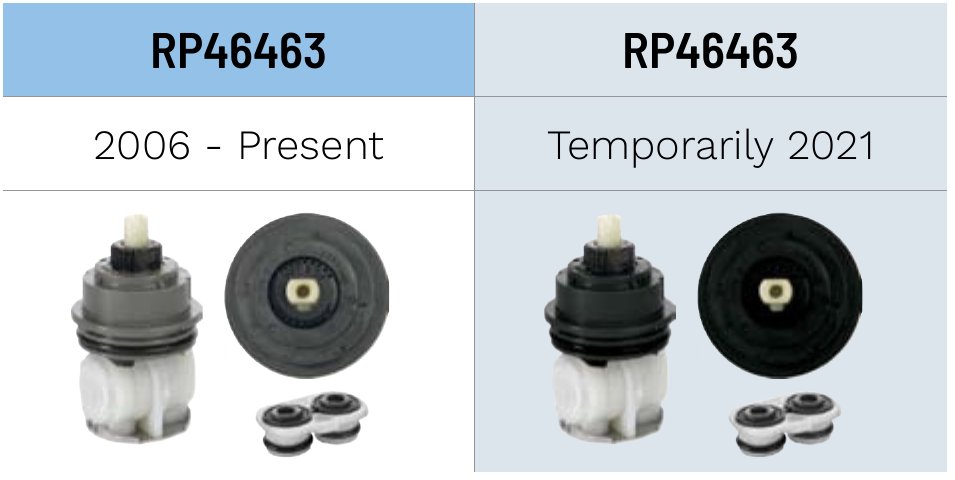
RP46463 for MultiChoice Universal T17
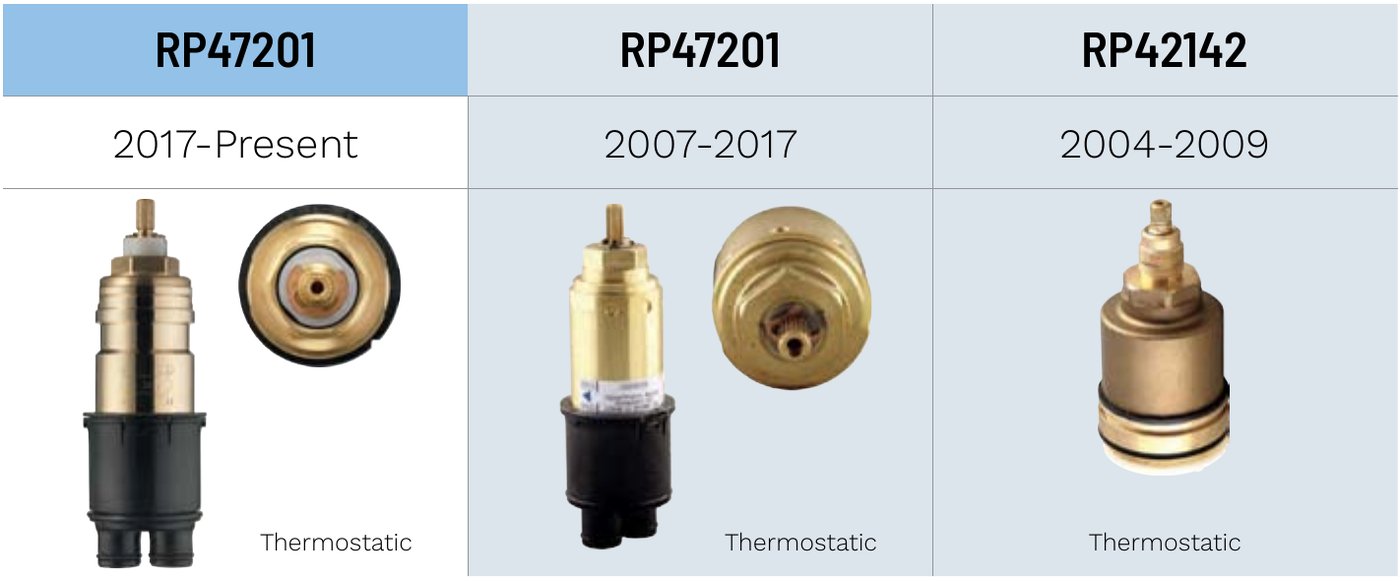
RP47201 for MultiChoice Universal T17T thermostatic
Quick reference
| Part | Valve | Handles | Made |
|---|---|---|---|
| RP19804 | Monitor 1300/1400 | One | 1993 to present |
| RP46074 | MultiChoice Universal, T13/T14 trim | One | 2006 to present |
| RP74236 | MultiChoice Universal, T13/T14 trim (ceramic) | One | 2013 to present |
| RP70538 | B114900 series | One | 2010 to present |
| RP1991 | 1600 series | One | 1974 to present |
| RP32104 | Monitor 1500/1700 (replaces RP16207) | Two | 1998 to present |
| RP46463 | MultiChoice Universal T17 | Two | 2006 to present |
| RP47201 | MultiChoice Universal T17T thermostatic | Two | 2007 to present |
Pull it the right way
With the bonnet off you see the top of the cartridge; the legs are still inside the valve. Look at the side of the upper body, not just the small disc around the stem. Doing this the wrong way damages the valve body.
- White, cream or off-white body, any shade: a Monitor RP19804. Do not pry it. Put the handle back on the stem and rotate it counter-clockwise while lifting the cartridge out of the two notches on the sides of the body.
- Grey body: a MultiChoice RP46074. Put a flat head screwdriver in the notch of the cap and turn it to raise the cartridge out.
- Black body, or you cannot tell: both were made in black in 2021. Do not pry it. Send us a photo of it in the valve and we will tell you which one before you pull it.
Confirm it once it is out
- One handle or two? Settle this first. The same colours mean different parts on a two-handle valve.
- Blue legs: RP19804, whatever colour the top is.
- Cream legs under a grey or black body: RP46074.
- Cream legs under a cream body: an original RP19804 from 1993 to about 2001.
- Length backs it up: the RP46074 is about 4.3 inches, the RP19804 about 4.1.
- TYPE P or TYPE T moulded on a MultiChoice cartridge tells you pressure balance or thermostatic. They are different repairs.
- Ignore stamped numbers. They are usually mould marks or the replacement maker’s code, not the part number.
Where to get the replacement
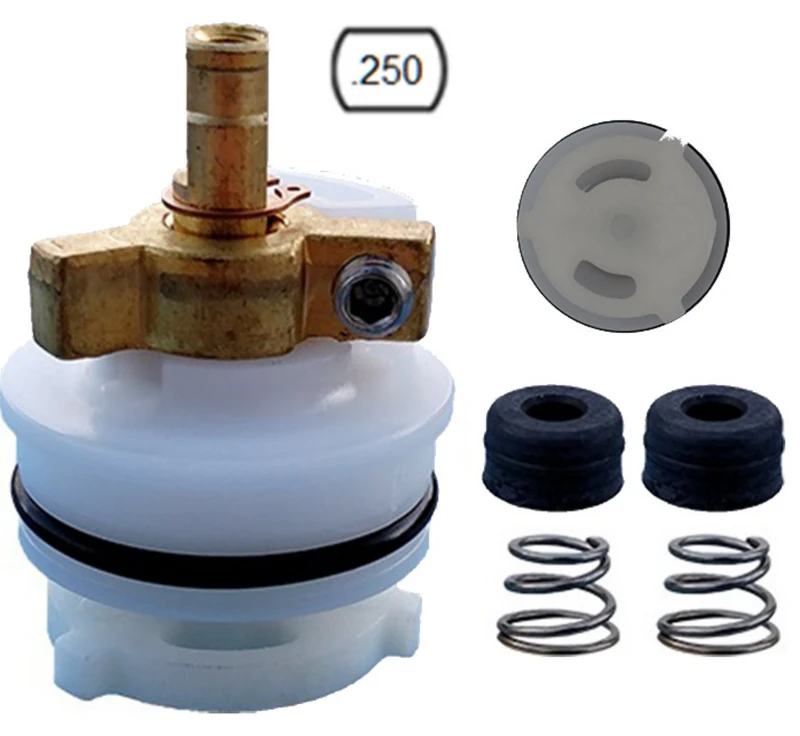
These are the replacements we stock, each listed with the specs to check against the one you pulled. Parts ship direct to the jobsite or your shop.
One-handle valves
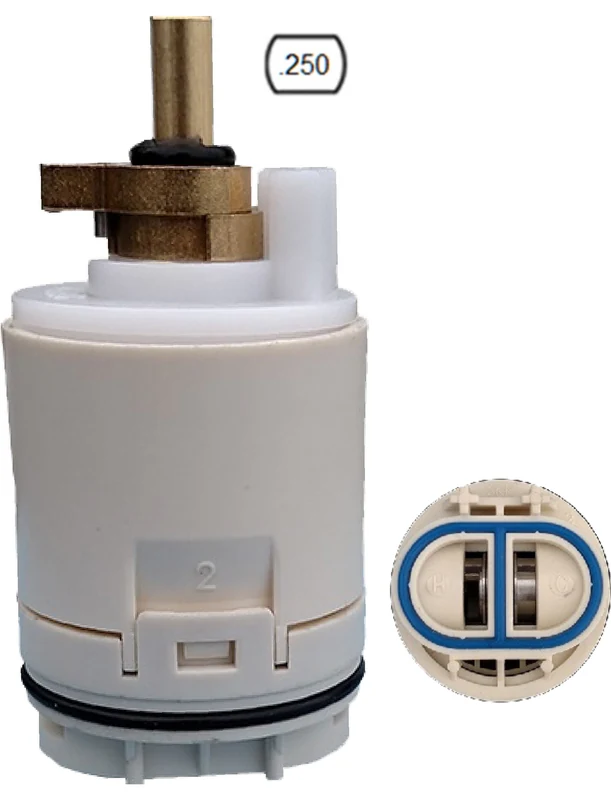
Two-handle valves
Still not sure which one you have?
The tells above settle the common cases. Where it gets expensive is a cap that has been painted or scaled over, a valve someone already fitted with the wrong cartridge, or a cartridge that matches nothing in the table. Photograph it at the fixture and send us the photo. A specialist confirms the exact replacement and posts an itemized written quote. Nothing is charged until you approve it.
Putting the new one in
Install the cartridge with the wording “Hot Side” on the hot water inlet side. Press it into the valve body and make sure the keys are fully engaged with the slots in the body.
For back-to-back or reverse installations, where hot is on the right and cold on the left, the rule is the same: “Hot Side” goes on the hot water inlet side.
Delta also warns not to twist the cap and lower housing of a new cartridge apart. If they do separate, twist them back until they snap together, and never take the lower housing apart.
Setting the Rotational Limit Stop
This is the step people skip, and on Delta it is a documented scald control, not an optional extra.
The Rotational Limit Stop limits how much hot water is available, so a handle turned fully to hot does not scald. The first position allows the least hot water. Moving it counter-clockwise adds more, and the last position to the left carries the greatest risk of scald injury.
Delta’s procedure:
- Run the water until cold is as cold as it gets and hot is as hot as it gets.
- Put the handle on the stem and rotate counter-clockwise until it stops.
- Hold a thermometer in a plastic tumbler in the stream.
- If the water is above 120°F, move the limit stop clockwise to bring it below 120°F, or lower if local code requires it.
- To adjust, pull the disc back far enough to free the limit stop and re-engage the teeth at the position you want. Clockwise lowers the outlet temperature.
Worth telling the customer: the limit stop may need adjusting with the seasons, since colder inlet water in winter changes the outlet temperature. A comfortable bath or shower is typically 90°F to 110°F.
Sources
Part numbers, valve series and dates on this page come from Delta’s cartridge reference guide (Delta Faucet Company form DL-2113) and Delta’s shower cartridge pictures support article. Delta notes that model lists change, so check deltafaucet.com/service-parts for your exact valve model. The replacements we sell are aftermarket parts, not made by or affiliated with Delta.